Chai Body Butter Bars

Everyone who knows me knows that I am OBSESSED with Lush.  Obsessed especially with their massage bars.  So when I started making my own cosmetic-y things I was keen to get into making these and boy am I glad I did.  The only thing I don’t like about these is that I think I may have been a bi heavy handed with the beeswax, but I can’t be perfect all the time now, can I?

I started off looking for something to use as a mould and I remembered that I had heart shaped ice cube trays so that seemed like as good a mould as any.  I then trawled the internet for body butter bar recipes to “cut and paste” together and add my own ideas to.

My recipe idea as you can probably guess from the title was a chai mix.  I’d seen some recipes adding exfoliants into these bars so I started off sprinkling some dry “vanilla chai” tea in the bottom of each section of the ice cube tray.  Then I melted up my cocoa butter (2), coconut oil (3) and beeswax (2).  This was  2:3:2 ratio of these ingredients (as demonstrated by the brackets :P).  Next I poured them into each heart slot and let cool.

chaibuttchaibuttpile

I love the smell of beeswax so I love these but I’m sure others won’t!

chaibuttwrap

They are quite hard but melt very easily onto the skin.  I’ve wrapped mine in greaseproof paper and am keeping them in the fridge to stop them getting accidentally melted!

Disclaimer: I’ve proof-read this post however my “T” key has been misbehaving so it is likely this post will have mistakes, sorry!

Activated Charcoal Cedarwood MANSOAP

Well, it smells good enough for ladies too… but it looks edgey and manly so I’m calling it MANSOAP 🙂

I’d been bursting to use activated charcoal in soap since I saw it on Etsy but I thought about making one all charoal, however I felt like it would be a bit too plain so I decided to mix it up with some titanium dioxide swirling.  I chose cedarwood because everything “Man-soapy” on Etsy was cedarwood  scented, pretty much a no-brainer, right?!

chartitanium

The basic soap recipe –

300g Olive Oil

225g Coconut Oil

112g Palm Oil

75g Shea Butter

38g Rice Bran Oil

Additives –

3/4 TBSP Activated Charcoal

Titanium Dioxide to suit colour

I’m also certain I added kaolin clay however I didn’t write that down so I can’t be sure..

So I melted the oils and mixed in the lye water (after running it through my choice of lye calculator – essential!!) to a light trace, adding the cedarwood essential oil at this point (also run through a soap calculator for amount.  That would have been when I added the kaolin clay – if I even did, I have NOOO idea :/ -. I then separated the mixture into two tubs adding titanium dioxide to one tub and the charcoal to the other.  I then took my mould and put a piece of cardboard down the middle in a hope of doing something fancy, but guess what… my mould has corrugated waves along the bottom!! So when I first poured in the white soap, it slid under the cardboard, but I persevered and swirled the two batters together in the mould and on top, and the result looks PRETTY cool! 🙂

swirlchar

charfin

My First Christmas Soap

So a couple weeks ago I made a start on some Christmas soap, which I find super exciting as I love Christmas… who doesn’t, right!?  I started off thinking of scents I wanted and sent off for the essential oils I wanted, and figured colour-wise red white and green – obviously mega christmassy!  To get those I have red iron oxide, french green clay and titanium dioxide.

The Basic soap recipe –

300g Olive Oil

225g Coconut Oil

112g Palm Oil

75g Cocoa Butter

38g Sweet Almond Oil

Additives –

Red Iron Oxide

French Green Clay

Titanium Dioxide

Kaolin Clay

Essential Oils –

Scotch Pine

Sweet Orange

Anise

I melted my hard oils – which smelled divine due to the cocoa butter!  And mixed in the liquid oils.  I made up the lye water and let both cool to about the same temperature.  While they cooled I put the three colourants into three plastic cups and blended them with a little of the soaping oils.  I also blended my essential oils until I was happy with the scent – be warned anise is a very dominant essential oil.  I popped the lye water in the soaping oils, blending them together to a light trace, adding the essential oil blend at this point.  Then I decanted some of the mixture into the cup with french green clay blending until incorporated and I was happy with the colour.  With the leftover batter in the tub I blended in some kaolin clay then decanted some into the red oxide cup, adding the titanium dioxide to the rest of the soap mixture.

ironclay

I layered the white red and green throughout my mould..

layering

– which was new, so I quickly discovered that I had a little bit too much soap for my mould.

mess

So the red dribbled over the edge a bit but I kept mounding the soap up into peaks, leaving my loaf to set up overnight and cut it the next day with my shiney new wire cheese cutter!  And the look of the soap was exactly what I was looking for – I did a light spoon swirl also (adding to the mess!).

xmas

I haven’t yet tested these out as they need a little more curing but I’m looking forward to it and continuing to devise new and exciting (to me anyway) Christmas soaps to make soon to give to friends and family so stay tuned!!

Cinnamon Porridge Soap

I made this soap a while back now and the idea came from looking into soaping with oats and oatmilk and such and so this recipe was born.

The basic soap recipe

240g Olive Oil

150g Coconut Oil

120g Palm Oil

30g Avocado Oil

30g Rice bran Oil

30g Shea Butter

Additives

Some oats – half fine, half rough (no amount it really was just “some”)

I mixed the fine oats in with some red iron oxide and ground cinnamon.

Process

I substituted the water for handmade frozen oat milk in the lye solution and added it to the melted oils.  Once at trace I separated the mixture into two parts with a 2:1 ratio.

Into the larger amount I mixed in the fine oats, iron oxide and ground cinnamon with a little cinnamon essential oil.  I mixed the rough oats in with the smaller amount, and leaving it unscented put that all in the bottom of my mould, followed by the bright red mixture, lightly texturing the top.

cinnamnporr

After 24 hours it was ready to cut!  It smells wonderfully warming and looks pretty cool for my 2nd batch of soap!  With its red and cinnamon-y topping and thick porridge looking bottom I was fair impressed with myself!

close porr

And when it was cut it didn’t fail to impress me further.

cutcpcupcpside

Three weeks later I took this freshly cured soap into the shower and loved it!! It can be quite scratchy but I really don’t mind that at all.  It’s lather wasn’t great but the smell was!! I now like to use the porridge side on my face as it is a good mild exfoliant and the cinnamon side on my hands as its even more abrasive.  You see as a nurse I was my hands 20gazillion-and-one times a day — at work, but when I’m on days off its almost like my hands are so used to having the top layer scrubbed away so often I end up with a powdery layer of skin begging for a scrubbing!!  I found its not very good for body washing as it does not lather well, as I said.  However I have found a lovely useful purpose for this soap so it’s not all bad!

Cosmetic additives.

So I don’t this has been mentioned but I’m pretty determined to keep everything as natural as possible as I want to gift my products to friends, colleagues and family and really don’t want them having nasty reactions to them.  So I figure that is less likely the more natural a product is.  Yes, I know people can still have allergies to natural things but I’m doing my best.

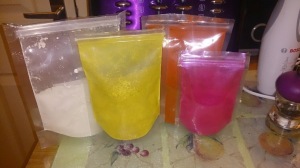
I wanted to find natural colouring additives for my soaps and cosmetics… Again, to the internet!  I found many, many different ways to colour my products and I am going to share as many as I can with you here.  I found most of them on ebay and amazon.

MICAS AND IRON OXIDES

 micas

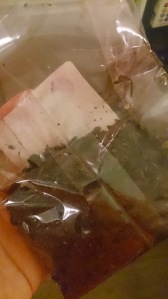
Micas and Iron Oxides are useful “safe” ways to colour soaps and other cosmetics.  It is however useful to read up on them before putting them on your skin.  They are mostly used for ascetic purposes in soaps and cosmetics, though some so have specific purposes.  Like I said it’s useful to read up on them before putting them in products.

CLAYS

clay

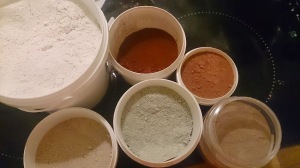
These are most useful in soaps as they add subtle colour and add slip to the finished product.  Some specific clays have their own wonderful properties so it’s worth researching them before use.  I’m currently in love with rhassoul clay.  It’s a grainier clay giving an exfoliating quality and a ruddy brown colour to soaps.  Clays are also high on the list of fab ingredients for face masks, scrubs and mineral make-up.
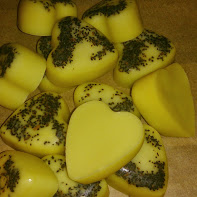
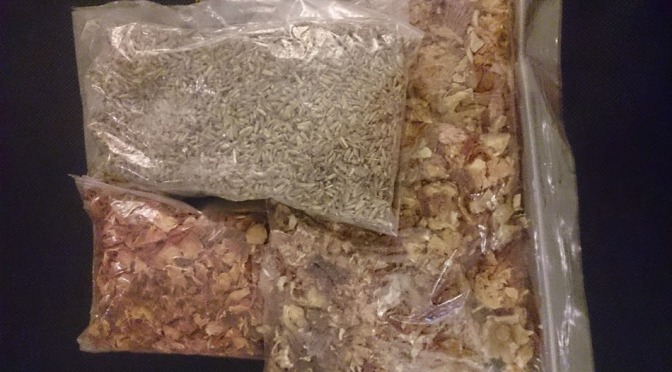
HERBS

lavender rose mallow chamocalend

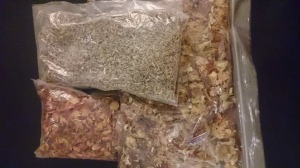
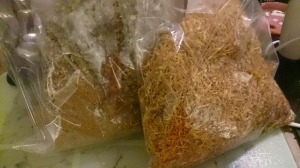
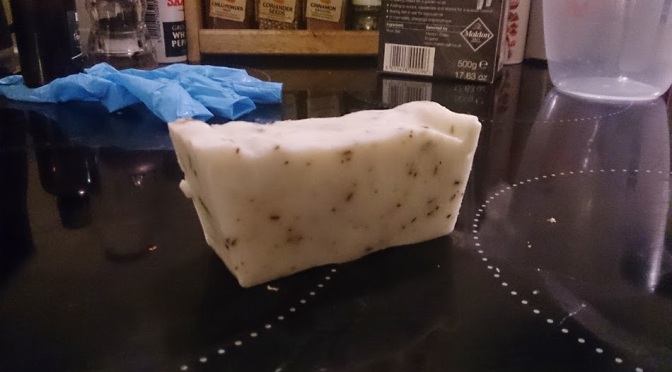
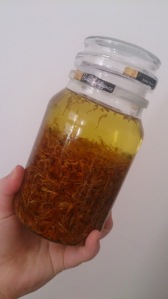
Dried herbs are fabulous in and on soaps.  Above is rose buds and petals, lavender buds, mallow flowers, chamomile flowers and calendula petals.  All of these carry various qualities in cosmetics and give a very luxurious touch to lotions and soaps.  You must beware of dried herbs and flowers in soaps though as mentioned in my first soaping post, they don’t often turn out as expected!!  So far the only dried herbs/flowers I have found to work IN soap is calendula, which thankfully keeps its lovely yellow colour, without bleeding or looking like something from a mouse’s bottom!  Another herb which works well is alkanet root which is useful for colouring soap purple.  I have infused it in olive oil and will substitute it for some of my olive oil from my batch to colour the soap – that adventure is yet to come!

alk olivealk

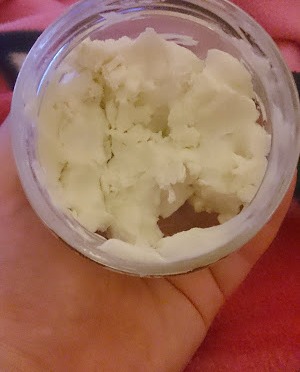
I have also infused calendula in olive oil for use in lotions.
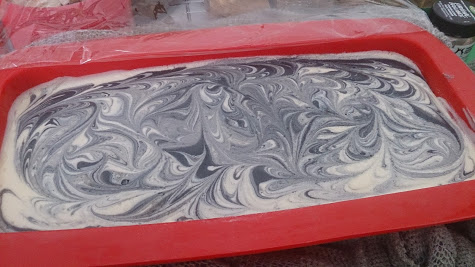
calan

ACTIVATED CHARCOAL

char

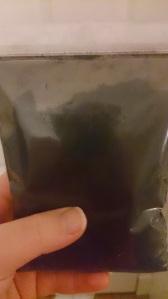
Activated charcoal is excellent for drawing out toxins from the skin, making it a very welcome additive in soaps, face masks, face and body scrubs, as well as being a natural way to colour your product – and your bathroom – coal black.

TITANIUM DIOXIDE

titanium

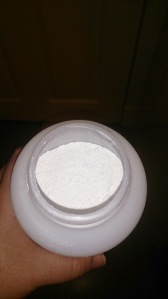
Titanium dioxide is used for colouring soaps and cosmetics – yup, you guessed it! – white!!  As far as I am aware it does not have any other skin benefits but feel free to correct me.

FOOD

salt coco

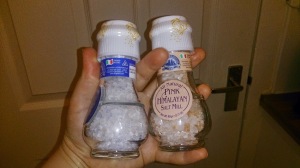
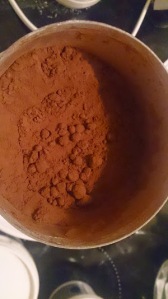
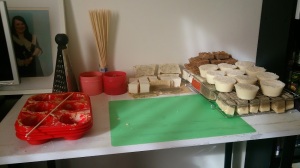
I’ve recently been experimenting making spa bars out of various fancy salts – once they have cured I will post a full update on how they work!  I also recently read that cocoa powder is an excellent additive for soap as it adds colour and a subtle scent which could, in theory, negate the need for fragrant and essential oils, making the finished product kinder on the skin.  It is also possible to use pulverise veggies in soap but I have not yet been brave enough to try.  Other foodie additives include teas, beer and milks, which all must be allowed to cool and flatten before being frozen then used as substitute for the water in the lye solution – more on this later.

ESSENTIAL OILS

ess

These all have their own qualities they have for products and all have beautiful scents which can add wonderful dimentions to your soaps, lotions, bath bombs etc.  Again I must stress everyone should read up on the pros and cons on the essential oils they use as they are not all suitable for all products.

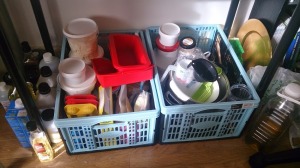
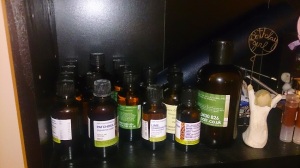
These are all the additives I currently have in my soaping area, and to be fair, I’m not sure I could fit any more, even though I SOOO want to!!

soaping soaptop

Chocolate Orange “Whipped” Body Butter

In my first order of supplies there was the godly cocoa butter.  If you have never smelled raw, unrefined cocoa butter, you are missing out.  Wow.  Just wow.

I had some orange essential oil and when I smelled them together (which is how I’ve come to decide on scents) I knew I had something.  Determined not to use all my lovely cocoa butter in a one-er I took to the internet to find out what works well with it for a body butter.  The answer?  Coconut oil, which had also come through the door with the cocoa butter. Score!

sniff

I then started to think what texture I wanted it.  I didn’t want to just melt them together and have a pot of hard oils i had to carve out so I thought I could blitz them together with my immersion blender – since I didn’t have a hand mixer.

So the finished product smells and feels fabulous.  But no, technically it’s not “whipped”, nor is it easy to get out the pot! but, it does smell divine and feels amazing on my skin so I’ll use it until it runs out, then it’s back to the drawing board…

chocorange

My First Soaping Experience.

The first soap I made was a simple one.  It was lemon and bergamot essential oil scented with tarragon flecks for looks.  I cannot remember where I got my basic oil mix recipe but it was a basic 3 oils of equal weight mix.

200g Olive oil

200g Coconut oil – I used food grade stuff from Tesco since I was WAYYY too impatient to wait for my order from amazon!  At £6 for less than 300g though, I think I’ll stick to patience next time!

200g Sweet almond oil

I melted these together in a pot and added my lye solution.  I’m not entering any lye/water amounts here as I feel everyone should get used to a lye calculator before starting soaping.  I then added the essential oils and tarragon and let set overnight in a silicone cake loaf mould.  I then unmoulded and cut with my smoothest kitchen knife – which is now my soaping knife.  It is not a good idea to mix soaping and cooking utensils!!!

First of all – I had NOT done enough research! Who knew you had to insulate soap?! Well not me!  So I had an off-white oval in the middle of all my soaps… hmmph!! The other downside of this recipe is that the tarragon looks like mouse poop.  But after 3 weeks of curing I was super surprised to find that it actually works!!!!!  I had made fully functioning soap, all by myself!! It lathered up nice and it smelled good! I was fair chuffed to say the least.  And I was encouraged, and so the soaping adventure continued…

How it started…

About a month ago I was sat at home with some dreadful bug.  On the nightshifts I had done a few days previous -which I am blaming for said bug- we had been discussing hobbies.  Normally I’d play guitar but since I now live in a tiny one bedroom flat with my boyfriend this had since become quite awkward to continuously do.  So as I found myself ill and stuck in bed, I began trawling through hobby sites looking for something to do.  First of all, if you have no idea what you want to do this can be a very laborious task… knitting.. no.. decopatch.. nah.. painting.. drawing.. Continue reading How it started…

a journey in discovering handmade is better